Categories
Westone Rebuild

Westone Cutlass Rebuild pt 3 – Oiling The Body And Rebuilding

icontexto-webdev-social-bookmark-09tipdrop logofacebook481I’m fully aware of how long it  has taken me to write this update and I seem to begin virtually every post with an apology these days, but you know how it is..

Anyway, the nice clean wooden body needed some protection from the wear and tear of musical life, and as I said in the last update all those months ago, the owner agreed with me about keeping it natural looking. The previous instalments of this series are here

After investigating various varnishes and lacquers, and taking advice from friends who know about this type of thing, I went for an oiled finish rather than a painted one. The problem with varnishes is that inevitably the finish will get damaged at some point and begin to chip away, looking pretty nasty over time.

Danish OilOiling leaves a nice satin finish and brings out the grain of the wood, while giving a reasonable amount of protection. I headed off to my local DIY warehouse and bought a large tin of Danish Oil for under a tenner, which will probably be enough to refinish every Westone Cutlass in existence! Applying it couldn’t be easier…tip some sparingly onto a clean duster and stroke it into the wood, keeping the coverage as even as possible. It dries in about 15-20 minutes and then you can keep adding layers (3 or 4) until a decent covering has been built up.

It looks pretty dark when first applied, but lightens up as it dries and soaks in, leaving the colour only slightly darker than the bare wood. When it has dried for a while the finish is buffed over with another clean duster to remove any excess and give a nice satin sheen.

I left it for a few hours to be sure it was fully dried out and then began re-assembly. I screwed the neck and bridge back into place and reinstalled the springs on the trem block.

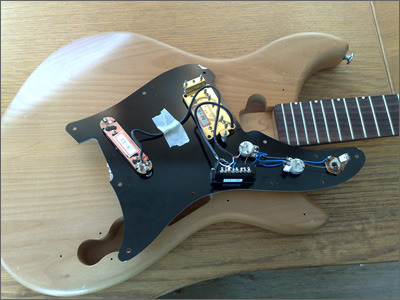
Most of the wiring was already in place as the scratchplate was fully assembled when I got the guitar, but I had dis-assembled it when I repaired the crack. I refitted the pickups and pots, and reattached the wires for the humbucking pickup which had become detached.

I did a quick test by plugging in a lead to the jack socket and my amp and tapped the pickups with a  screwdriver to check I had sound, and as all seemed ok I went ahead with re-fitting the scratchplate assembly.

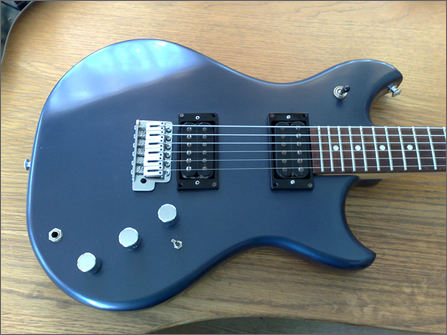
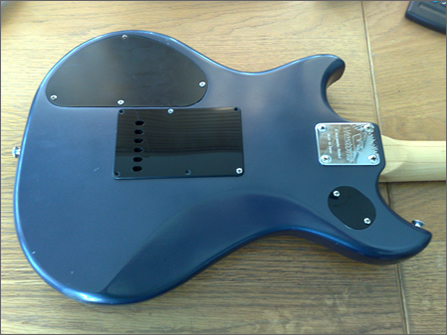
After that, it was just a case of re-stringing and setting the bridge. The neck was perfect and didn’t need any truss rod tweaking so the whole re-assembly took less than an hour. A real pleasure after the hassles with the Westone Thunder 1-T rebuild.

This is a GREAT guitar. I love the feel and the sound of it, It’s beefier than a Strat, but still capable of subtle tone variations. The humbucker (by Gotoh, I believe) screams nicely and the whole package is well balanced and well made.
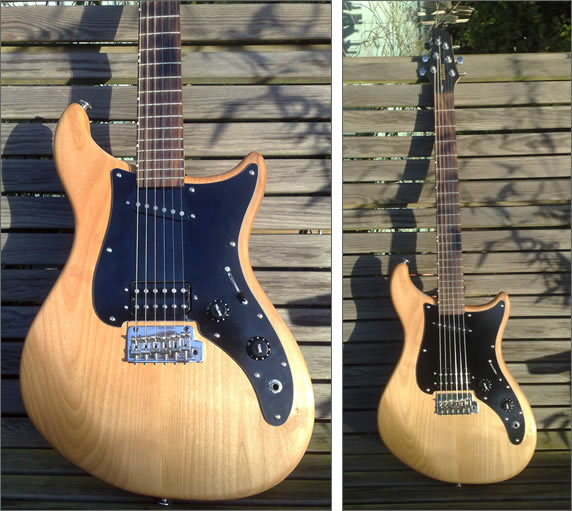
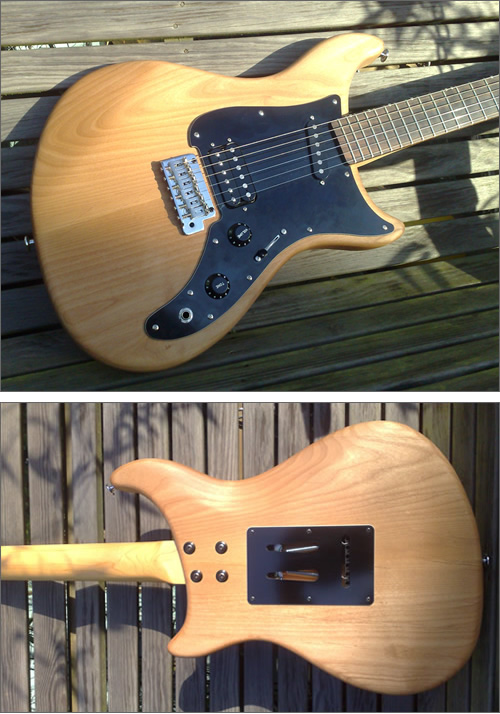
Rebuilt Westone Cutlass

Westone Cutlass back and front

amazon banner ad

Categories
Westone Rebuild

Westone Cutlass Rebuild pt 2 – The Body and the Scratchplate

icontexto-webdev-social-bookmark-09facebook481As I said in part one of the Westone Cutlass rebuild, I have decided not paint this guitar, but to keep it natural looking.

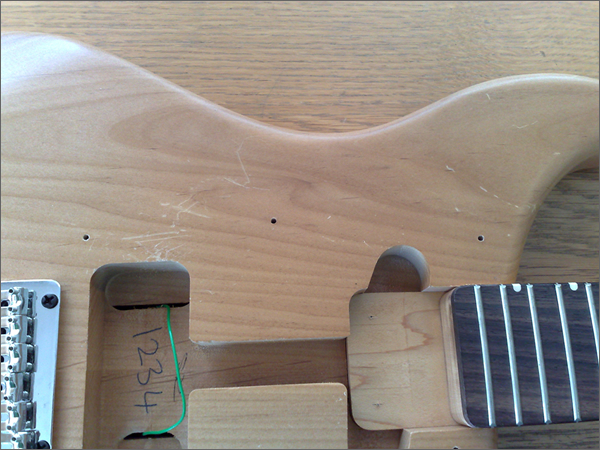
The original body finish was a pale, yellowy clear lacquer which suited the look of the guitar, but now has some quite deep scratches and dents on the front, back and upper horn (see pic).

Westone Cutlass body

Unlike a painted finish, it isn’t possible just to sand back the top coat and use wood filler to fill any blemishes. As the wood will be on display under a few coats of wood oil, the base has to be as perfect as possible.

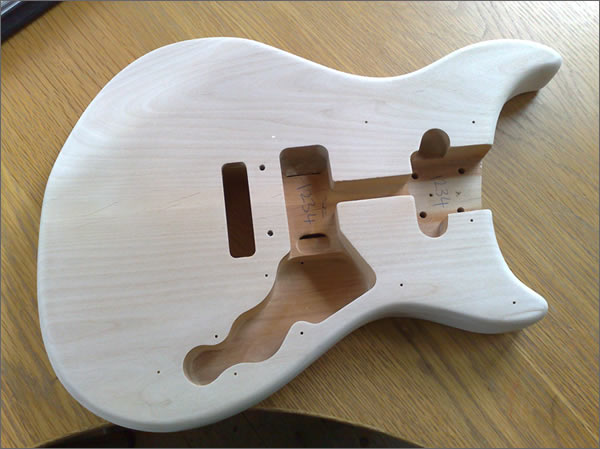
This lead to a hot sweaty Sunday afternoon with an array of different types of sandpaper and a sanding block to remove all traces of the old finish and the blemishes. I was lucky, none of the marking was so deep that it couldn’t be sanded out, and after an hour or two I had a pristine body, looking as good as the day it was cut! The grain is very attractive, with some darker marks behind the bridge area which look like scratches, but and just part of the natural colouring of the Alder body.

Westone Cutlass body

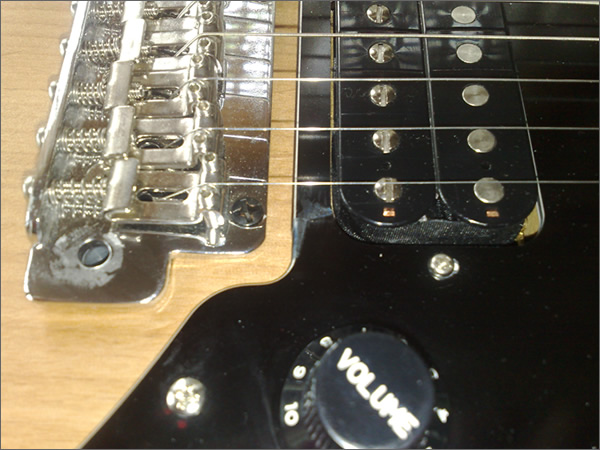
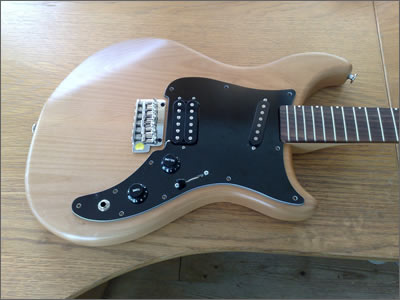
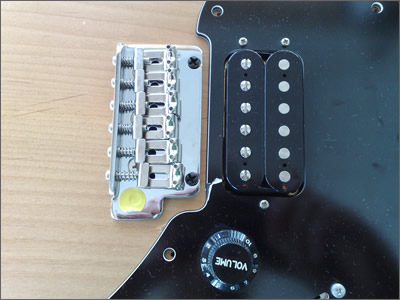
The scratchplate damage is the other main issue with this guitar, but it is fixable with no huge chunks missing; just a split below the bridge and a little piece gauged out. I have mentioned in the Westone Thunder rebuild series that my other hobby is building model cars. This comes in useful with guitar repairs too, as I am used to doing close intricate work, and I also have a large array of tools and items for manipulating plastic.

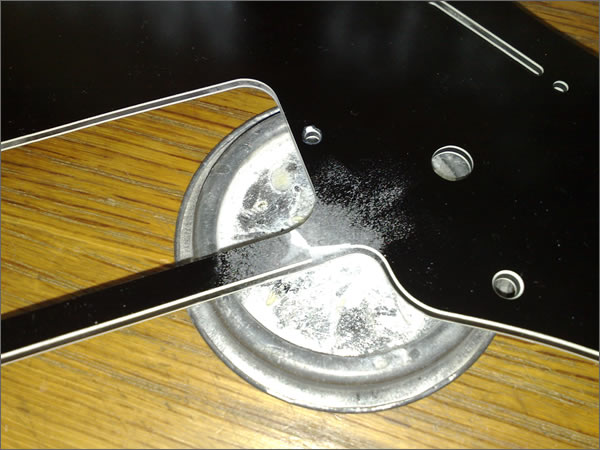
One such item is a product called microballoons, which is a filling material. It is basically a very fine white resin powder which is mixed with superglue to produce a sandable filler which sets almost instantly. I began by gluing the crack in the scratchplate with superglue, then when that had dried, I used the microballoons to build up the surface again to the previous level.

Westone Cutlass scratchplateOnce this had dried, I carefully sanded back the excess coloured the white microballoon area with a black felt tip pen. It’s not perfect, but it’s a solid repair and hardly noticeable now the guitar is back together.
Westone Cutlass scratchplate

Next instalment will be about oiling the body and putting it all back together.

Categories
Westone Rebuild

Westone Cutlass Rebuild pt 1 – The Background


icontexto-webdev-social-bookmark-09facebook481

When I first started this site, one of the reasons was to get back into restoring, customising and fiddling with guitars.

Westone Cutlass restoration project

I have played around with guitars all my playing life (30 years this month!) as most of us players do. It is always useful to know how to fix your own gear, and sooner or later a pickup will need changing, or a machine head will break and all of a sudden you find yourself up to your eyes in bits of guitars.

Last year I was browsing Ebay and I found a Westone Thunder for sale in appalling condition. It really was the worst I had seen, with virtually every piece of it broken in some way. I bought it and restored it, and the story is on this blog here.

As part of  the process during the restoration, I used my Twitter account to alert readers to new updates, and to publicise this blog. I was contacted during the build and asked if I would be interested in restoring another Westone.

It’s a Westone Cutlass, which was built in the UK, not Japan in the late 90’s and is actually a really nice guitar. I have been researching them and I’ve put togther a short history of the Westone Cutlass here.

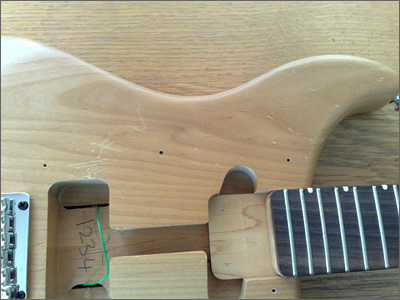
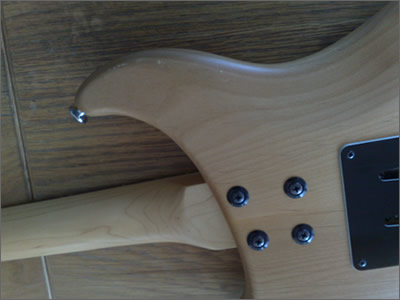
This one was in pieces, but complete when I got it with a few scratches and marks in the clear lacquer, and a small break in the scratchplate, near the bridge. Originally it was to be painted in the same colour blue as my Thunder, but after discussion we decided it would look better natural, in keeping with its original look.

Here are a few shots of the guitar as recieved, next installment will deal with the body refurbishment.

Westone Cutlass restoration project

Westone Cutlass restoration project

Westone Cutlass restoration project

Westone Cutlass restoration project

Categories
Westone Rebuild

Westone Thunder 1-T Rebuild pt 6…Finally finished!

I can’t believe that last update on this subject was December 31st 2008!

Sorry for the massive time lag, in truth the guitar was finished months ago but I had been busy writing on so many other subjects I just forgot to tie this subject up.

In the last post I alluded to the wiring issues I was facing. It took a bit of head scratching and some advice from a few knowledgable friends to finally solve the issue I had with an earth type buzz. It turned out I had bought a stereo jack socket and wired it wrongly. Once that was solved, and I found a great wiring diagram from the fantastically useful Westone Info site I was sorted. I used new shielded cable for all the new wires and resoldered all the joints on the existing wiring.

All that was then left to do was restring it and set it up. After a little tweaking of the string heights it was playing great.

It’s a heavy guitar..almost in Les Paul territory..and this adds to the feel of solidity when you play it, although I think the shape is more comfortable than a Les Paul. The pick ups are gutsy, and the coil tap switch adds a nice dimension, allowing some decent “thinner” single coil tones through for clean picking. The worn lacquer on the neck sides adds to the “patina” of playing an older guitar, and the paint finish, although not perfect, is certainly a big step from the way it looked when it arrived!

Overall its a versatile guitar and well beyond the feel of being the budget instrument it was originally marketed as.

Since this project started I have been approached to do another westone rebuild, a Cutlass, which is in much better shape. I’ll be filling you in with the details in the next post.

Thanks to everyone who has commented on this project, particularly the guys and girls over at the Westone Forum for their advice and encouragement.

Rebuilt Westone Thunder 1AT

Rebuilt Westone Thunder 1AT back

Categories
Westone Rebuild

Westone Thunder 1-T Rebuild pt 5…Rebuilding


Now the body has been sanded and polished out, I can begin the rebuild, using a selection of old and new parts.

First thing to go back on was the neck. When I got the guitar it only had 2 screws holding it in place, instead of the 4 it should have.I managed to find two more similar screws, and using the old neck plate I re-attached the neck.  Although the edges of the lacquer around the frets is a little scabby, I sanded it lightly to take the rough edges off and left it alone. I want to retain some “patina” of age.  I did give the frets a good clean though, and also treated the fingerboard with a healthy dose of lemon oil.

I also stuck in a new nut, using 2 part epoxy glue, guessing the position. I was hoping that I wouldn’t have to break the glue joint to re-position the nut, and luckily I got it right first time..phew!

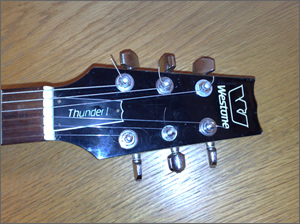
headstockThe original machine heads were reinstalled before the neck was re-attached, using a flat washer to replace the one missing one. I also tightened up the tensioning screws, and the work just fine, although the chrome is showing its age somewhat.
The one cock-up I made was in polishing the truss rod cover…I thought the lettering was indented, and in my enthusiasm polished it a little too vigurously, losing a little definition on the letter edging…oh well…

The bridge went back on next, then the pickups, with new screws and pickup rings. The wiring was fed through to the cavity, but left for now. I also fitted the new pickup selector switch, using the original brass lock nut, again, feeding the wiring through to the cavity.

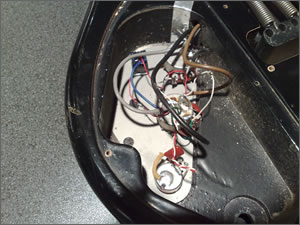
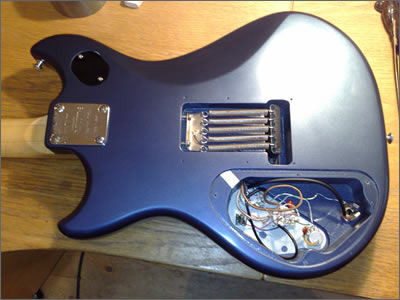
The next post will be about my wiring adventures, but here’s a sneak preview of the insides…Thanks for reading!


The re-built guitar from the rear
Categories
Westone Rebuild

Westone Thunder 1-T Rebuild pt 4…Painting


As I said in part 3, I have decided on a Volvo car colour for the body, a dark blueish grey metallic colour from an aerosol can.  ( I can’t remember the colour name!) I bought grey primer, 2 cans of blue and 2 cans of clear lacquer from my local Halford car parts shop as well as some 600 grit and 1500 grit wet and dry paper.

The body was filled, sanded, filled, primed and sanded as described in the last post, until I had an even base of grey primer. I didn’t get the body immaculate…there are still a few small dings, mainly on the edges, but it’s a whole lot better than it was, and perfection wasn’t what I was aiming for…just a decent looking usable guitar bought back from the dead!

Finally, I started laying down the base colour. I hung the body on my washing line in the garden and heated the cans of paint in hot water until they were warm. This raises the pressure in the can, allowing the paint to flow faster anD to cover more evenly. ( A trick I learned from my model car building buddies).

I laid down a couple of light “mist” coats to begin with, until the whole body had an even covering of the metallic blue, then built up layer by layer, allowing the paint time to dry in the warm (indoors) for a few hours between each coat. This allows the paint to “gas out” which lets the solvents used to propel the paint from the can evaporate between coats, which in turn helps the whole drying and paint hardening process.

I gradually built up the paint layers, getting a wetter, heavier coat on each time, but also making sure i didn’t get any runs in the paint. Eventually I had used two full cans of blue on the body, and I had a pretty even, semi-gloss finish.

As the paint is metallic it needs a clear lacquer coat to bring out the shine, so after a day or two of drying in my warm office, I repeated the whole process with the clear coats. After the first can I did give the whole body a light sanding with 600 grit wet and dry to flat the surface back, taking out the worst of the unevenness from the finish. This can be a scary process, as the paint goes totally matt again, but if you are careful enough not to go through to the colour coats, it will add to the smoothness of the final paint job.


The painted and polished body

 After the two full cans of clear had been used up, I left the body to dry and gas out for a few days while I started gathering the new parts needed. The next part will be about the new bits, but to finish up the body, after the drying process I polished the clear layers with my special polishing kit…again, another model car item.

A polishing kit is a series of small pieces of glass paper, going from 1500 grit right up to 12,000 grit. (which feels like velvet). The process is to sand the body (with water) removing any high spots in the cleat coat. This again will make the paint look matt, but will leave a very smooth finish. After the initial sanding with the 1500 grit, you move to the next finer paper (1800), and repeat the sanding process (always wet, dipping the glass paper in water and using the supplied rubber sanding block to wrap the paper around).

This process polishes the clear coat with finer and finer grades, making the finish super smooth and bringing back the shine. You work through the grades, 2400, 3200, 4000, 6000, 8000 and 12,000 until the final grade doesn’t appear to be doing anything at all. After drying the body and giving it a going over  with guitar polish the results can be pretty spectacular…A glassy shiny smooth paint finish, which should be just as hard wearing as the original.


Ready for rebuilding...

As previously mentioned, the finish isn’t perfect, but I’m pretty happy with the results.

The paint cost me about £15, and I already had the other supplies so I’m ready to begin rebuilding in the next post.

Thanks for reading!

Categories
Westone Rebuild

Westone Thunder 1-T Rebuild pt 3…Analysis and Rebuild


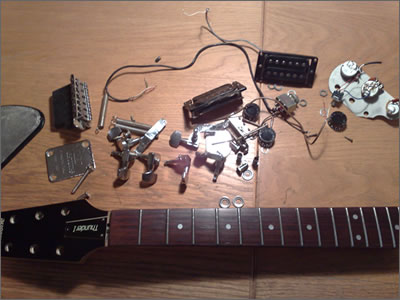
I stripped the guitar down into its remaining component parts, as mentioned in the second part of this article.

Most of the damaged parts were then assesed and either thrown out (like the pick up rings) or attempts were made to salvage them.

The stripped down parts

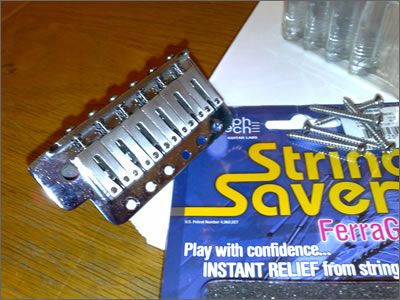
The bridge was very grungy and rusty…the saddles were stuck tight, needing my cutting wheel to get two of them off and all the screws were chewed up and useless. The only answer was to replace the set.  I got some Graphtech “string saver ferra glides” which have a graphite insert to ease the possibility of string breakage, but were pretty costly at £19.95. I cleaned up the baseplate and tremelo block and re-assembled the whole thing.

The original bridge
The original bridge


The rebuilt bridge
The rebuilt bridge

The body was stripped of all parts and sanded with coarse sandpaper to remove the top coat of clear lacquer and give a good base for the wood filler I needed to use to fill the dents and gouges. I used some basic white plastic wood filler I found in my local hardware shop…The colour didn’t matter as it was being painted anyway. It was then a case of tediously filling, sanding, checking, re-filling, sanding, etc until all the big problem areas were smooth. Fingertips is the best tool for this job…your sense of touch is more reliable than sight when it comes to imperfections of this nature.

Here’s the body hanging on my washing line with the first “ghost” coat of primer, which gives a final indication of any rough areas before the remainder of the primer and top coat get applied.

The first coat of primer

Next post I’ll deal with painting the top coat and the hunt for spares…

Thanks for reading, please feel free to comment on my efforts…literary and practical!

Categories
Westone Rebuild

Westone Thunder 1-T Rebuild pt 2…The Damage


The guitar arrived safely, although frankly if it had been kicked to my house from 200 miles away the damage wouldn’t have been much worse! I unpacked it and before any stripping down, I took a few photos and got a basic overview of what needs doing. It’s a pretty extensive list…the issues are as follows;

  • Pickup selector switch broken 
  • Mini Toggle switch broken
  • Nut missing
  • Both pickup rings broken, and mounting screws all chewed up and rusty
  • Missing machine head ferrule
  • Bridge saddles rusted, all screws in nasty conditon
  • Jack socket missing
  • Tremelo cover missing
  • Tremelo arm missing
  • Some frets in poor condition
  • 2 neck screws missing, others damaged
  • wiring looks very shoddy..no idea if the pickups work
  • Body has gouges and scrapes, paintwork in very bad condition
So I have my work cut out for me! On the plus side, the body feels weighty and substantial and the neck looks good. I reckon all the rest is fixable with these two good fundamentals.
Close up of the damage
In a flurry of enthusiasm I stripped the whole thing apart, unsoldered the remaining wiring, removing the pickups and bagging everything for later investigation.
I had two pieces of luck straight away…my parts box gave up a matching machine head ferrule and I had a spare Tremelo arm, bought for my Squier Strat but the wrong thread..it fits the Westone perfectly!
The body will need sanding, filling and re-spraying, and I won’t be returning it to black…I feel like a new colour and the current condition  is so poor a refinish won’t harm the guitar’s value.
I’m thinking maybe a darkish metallic blue/grey colour I have seen…A Volvo car colour.
The wiring mess
The wiring mess

I have also toyed with the idea of metal pickup covers, but it seems pointless buying parts until I know if they work or not. I may need two new humbuckers.

Next post I’ll begin the rebuild. Thanks for reading!
Categories
Westone Rebuild

Westone Thunder 1-T Rebuild pt 1…The Background


Many years ago I built a guitar from scratch, making my own body and using a Stratocaster copy neck.

My first home-made guitar

It played ok, and was “of its time” but after that initial flurry of sawdust and bad wiring I didn’t really dabble in guitars apart from changing the odd pickup and general maintenance.

Over the years however, I have been a prolific builder of model cars, which has given me the ability to paint and modify stuff, and also a quite enviable collection of small tools and useful bits and pieces.

Just recently I have fallen in love with guitars again. I have never stopped playing (guitar and bass), but my son has become an avid and proficient player and enthusiast, which has re-awakened my interest in guitars and collecting.

So one day while surfing around Ebay I found a knackered old Westone Thunder 1T guitar being sold as a project. It was in very poor condition, with many missing bits.

As the buyer says in his own words..

“This guitar needs a total overhaul…It was working 10 years. There are  missing screws, nut, jack socket, 2 tuner ferrules and 2 broken switches. It is covered in scatches and dings. The neck looks straight (see photo). I do not know if the electrics work but they did, this was my sons first guitar, and was soon upgraded.”

The front
The back
The back


I won the auction for £46 plus £15 postage and the guitar was with me within 4 days.

Next post I’ll tell you all about the work ahead in detail, and my ideas for the rebuild.

Thanks for reading!